


In the fast-paced world of technology, dealing with a slow computer can be a frustrating experience. Whether you’re working, gaming, or just browsing the internet, a sluggish system can significantly hinder your productivity. In this comprehensive guide, we’ll explore various reasons behind a slow computer and provide effective solutions to optimize its performance.
Section 1: Understanding the Causes of a Slow Computer
1.1: Resource-Hungry Applications
- Identify and manage applications that consume excessive system resources.
Identifying and managing applications that consume excessive system resources is crucial for optimizing computer performance. Here’s a step-by-step guide to help you efficiently deal with resource-hungry applications:
1. Task Manager (Windows) or Activity Monitor (Mac):
For Windows (Using Task Manager):
- Access Task Manager:
- Right-click on the taskbar and select “Task Manager” or press
Ctrl + Shift + Escto open it directly.
- Right-click on the taskbar and select “Task Manager” or press
- Check Resource Usage:
- Navigate to the “Processes” tab.
- Click on the “CPU” or “Memory” column header to sort processes based on resource usage.
- Identify Resource-Intensive Applications:
- Look for applications with high CPU or memory usage.
- Pay attention to the “Background processes” section as well.
- End Task or Disable Startup:
- Right-click on the resource-intensive application.
- Select “End Task” to close it or consider disabling it from starting up with your computer.
For Mac (Using Activity Monitor):
- Open Activity Monitor:
- Go to “Applications” > “Utilities” > “Activity Monitor” or use Spotlight (
Cmd + Spaceand type “Activity Monitor”).
- Go to “Applications” > “Utilities” > “Activity Monitor” or use Spotlight (
- View CPU and Memory Usage:
- Click on the “CPU” or “Memory” tab to see processes sorted by resource usage.
- Identify and Manage Applications:
- Identify applications with high resource consumption.
- Right-click on the application and choose options like “Quit” or “Force Quit.”
2. Windows Resource Monitor or Mac’s Command Line (Optional):
For Windows (Using Resource Monitor):
- Access Resource Monitor:
- In Task Manager, go to the “Performance” tab and click on “Open Resource Monitor” at the bottom.
- Analyze Resource Consumption:
- Navigate through tabs like CPU, Memory, Disk, and Network to get detailed information.
For Mac (Using Terminal):
- Open Terminal:
- Go to “Applications” > “Utilities” > “Terminal.”
- Check Processes:
- Use commands like
toporps auxto view active processes and their resource usage.
- Use commands like
3. Third-Party Tools:
- Process Explorer (Windows):
- A more advanced tool than Task Manager, providing in-depth information about running processes.
- htop (Linux and macOS):
- A powerful, interactive system-monitor process viewer for Unix-like systems.
4. Preventive Measures:
- Regularly Check Task Manager or Activity Monitor:
- Make it a habit to check resource usage periodically to catch potential issues early.
- Update Applications:
- Ensure that your applications are up-to-date, as updates often include performance optimizations.
- Consider Alternative Applications:
- Explore lighter alternatives to resource-intensive applications.
5. Consider Professional Assistance:
- System Optimization Software:
- Utilize system optimization tools that can automate the process of identifying and managing resource-hungry applications.
- Consult IT Professionals:
- If you’re unsure or facing persistent issues, seek assistance from IT professionals who can provide tailored solutions.
By following these steps, you can effectively identify and manage applications consuming excessive system resources, ultimately leading to a smoother and more efficient computing experience.
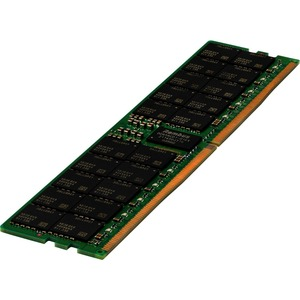
1.2: Insufficient RAM
Random Access Memory (RAM) is a crucial component of a computer’s hardware, playing a fundamental role in overall system performance. Here’s an explanation of the importance of RAM and its impact on the functionality and speed of a computer:
- **Temporary Storage for Active Processes:
- RAM serves as the temporary workspace for active processes and applications that are currently running on your computer. It provides quick and easy access to the data that these processes need to function efficiently.
- **Faster Data Access:
- Unlike storage devices such as hard drives or SSDs, which provide long-term storage but are slower to access, RAM is much faster. It allows the CPU to rapidly retrieve and store data, significantly speeding up the execution of tasks.
- **Multitasking Capability:
- Adequate RAM enables the system to handle multiple tasks simultaneously. For example, if you’re running multiple applications, tabs in a web browser, or complex software, having sufficient RAM ensures that each process can access the memory it needs without slowing down the others.
- **Improved System Responsiveness:
- RAM contributes to the overall responsiveness of the system. When you open a program or file, it is loaded into the RAM for quick access. This makes the system feel more responsive and reduces lag or delays when interacting with applications.
- **Preventing Bottlenecks:
- In situations where RAM is limited, the system may rely more on the slower storage devices (like hard drives), leading to bottlenecks. This can result in slower load times for applications and a generally sluggish system.
- **Enhanced Gaming Performance:
- Modern games and graphic-intensive applications often require a substantial amount of RAM. Sufficient RAM ensures smooth gameplay by allowing the quick loading of textures, graphics, and other game assets.
- **Efficient Virtual Memory Usage:
- When RAM is full, the operating system uses a portion of the storage device as virtual memory. However, relying too heavily on virtual memory (paging to the disk) can significantly slow down the system. Having ample RAM reduces the need for frequent access to virtual memory.
- **Optimal Performance for Resource-Intensive Applications:
- Resource-intensive applications, such as video editing software or 3D modeling programs, demand a significant amount of memory. Having ample RAM ensures that these applications can operate smoothly without constant data swapping between RAM and storage.
- **Better System Stability:
- Adequate RAM helps prevent system crashes or freezes. When the system runs out of available RAM, it may become unstable, leading to errors or abrupt shutdowns.
In summary, RAM is essential for ensuring a smooth and efficient computing experience. It empowers your computer to handle various tasks simultaneously, reduces data access times, and plays a vital role in supporting resource-intensive applications. Upgrading RAM is often an effective way to enhance overall system performance, especially if you frequently engage in multitasking or use demanding applications.
Checking available RAM and upgrading if necessary is a straightforward process. Below is a guide that provides step-by-step instructions for users on both checking their current RAM status and upgrading if needed:
Checking Available RAM:
For Windows:
- Task Manager:
- Right-click on the taskbar and select “Task Manager” or press
Ctrl + Shift + Esc. - Navigate to the “Performance” tab.
- Under “Memory,” you’ll see information about the currently used and available RAM.
- System Information:
- Press
Win + Rto open the Run dialog. - Type
msinfo32and press Enter. - In the System Information window, navigate to “Components” > “Memory” for detailed information about installed RAM.
For Mac:
- Activity Monitor:
- Open “Activity Monitor” from “Applications” > “Utilities.”
- Click on the “Memory” tab to view information about RAM usage and availability.
- About This Mac:
- Click on the Apple logo in the top-left corner.
- Select “About This Mac” and then click on “System Report.”
- In the left sidebar, navigate to “Hardware” > “Memory” for detailed RAM information.
For Linux:
- Terminal:
- Open the terminal.
- Use the command
free -hto display information about total, used, and available memory.
- System Monitor:
- Many Linux distributions come with a system monitor tool.
- Use the graphical interface to view memory usage.
Upgrading RAM:
- Determine Your System’s RAM Limit:
- Check your computer’s documentation or visit the manufacturer’s website to find information on the maximum RAM your system supports.
- Identify RAM Type and Speed:
- Determine the type (DDR3, DDR4, etc.) and speed of your existing RAM modules.
- This information is usually available in your system’s documentation or the System Information tool.
- Purchase Compatible RAM:
- Buy RAM modules that match your system’s specifications.
- Popular vendors for purchasing RAM include Crucial, Kingston, Corsair, and G.Skill.
- Turn Off and Unplug Your Computer:
- Shut down your computer and unplug it from the power source.
- Locate and Open RAM Slots:
- Open your computer case or access the laptop’s RAM compartment.
- RAM slots are typically easy to locate on the motherboard.
- Remove Existing RAM (if upgrading):
- If you are upgrading, release the clips on the sides of the existing RAM modules and gently remove them.
- Install New RAM Modules:
- Align the notches on the RAM module with those on the slot.
- Press down firmly until the clips click into place on both sides.
- Close the Case and Power On:
- Close the computer case or laptop cover.
- Plug in and power on your computer.
- Check System Information:
- Recheck the available RAM using the methods mentioned earlier to confirm the successful upgrade.
Note:
- RAM upgrades are relatively simple, but if you are unsure, consult your computer’s manual or seek professional assistance.
- Ensure the new RAM modules are compatible with your motherboard.
- Upgrading RAM can significantly improve system performance, especially for multitasking and resource-intensive applications.
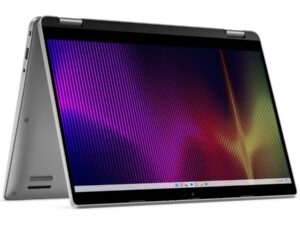
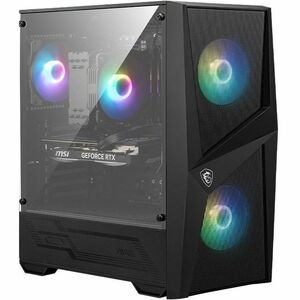
1.3: Outdated Hardware
Outdated hardware, including hard drives and graphics cards, can have a substantial impact on a computer’s speed and overall performance. Let’s delve into how each component influences the system:
Outdated Hard Drives:
- Speed and Data Transfer Rates:
- Old hard drives, particularly those with mechanical components (HDDs), have slower read and write speeds compared to modern solid-state drives (SSDs). This affects the time it takes to load applications, boot the operating system, and transfer files.
- Fragmentation Issues:
- Over time, data on hard drives becomes fragmented, leading to scattered storage across the disk. Fragmentation slows down read and write operations, causing delays in accessing information.
- Limited Cache and Buffer:
- Outdated hard drives often have smaller cache sizes and buffers, limiting their ability to temporarily store and retrieve data quickly. This can result in slower performance, especially when dealing with large files or multiple tasks.
- Seek Time:
- Mechanical hard drives have a seek time, indicating the time it takes for the drive’s read/write head to locate and access specific data on the disk. Older drives tend to have longer seek times, contributing to slower performance.
Outdated Graphics Cards:
- Limited Processing Power:
- Aging graphics cards may lack the processing power needed to handle modern graphical demands, including high-definition video playback, complex 3D graphics in games, and graphics-intensive applications.
- Incompatibility with New Technologies:
- New software and games often leverage advanced graphics technologies that may not be supported by outdated graphics cards. This can result in compatibility issues, reduced performance, or even failure to run certain applications.
- Insufficient Video Memory:
- Graphics cards come with dedicated video memory (VRAM) to store textures, frames, and other graphical elements. Older cards may have limited VRAM, leading to poor performance in tasks requiring large amounts of graphical data.
- Lack of Driver Updates:
- Manufacturers regularly release driver updates to optimize compatibility and improve performance. Outdated graphics cards may no longer receive driver updates, leading to suboptimal performance and potential security vulnerabilities.
Impact on Overall System:
- Bottlenecks:
- Outdated hardware, particularly hard drives, can create bottlenecks in the system. Even if other components, such as the CPU or RAM, are more advanced, the overall performance is limited by the slowest component.
- Slow Boot Times:
- An old hard drive can significantly extend the time it takes for the operating system to boot. Loading the necessary system files and startup applications becomes a time-consuming process.
- Stuttering and Lag:
- In the case of graphics cards, outdated hardware can lead to graphical stuttering, frame drops, and overall lag during resource-intensive tasks, impacting the user experience in gaming, video editing, and other graphics-heavy applications.
- Limited Multitasking:
- Outdated hardware may struggle to handle multiple tasks simultaneously, leading to a decrease in overall system responsiveness and the ability to efficiently run modern applications.
Recommendations:
- Upgrade to SSDs:
- Replace old hard drives with modern SSDs for significant improvements in data transfer speeds, reduced seek times, and overall system responsiveness.
- Upgrade Graphics Cards:
- Invest in a newer graphics card to ensure compatibility with modern technologies and better performance in graphics-intensive tasks.
- Regular System Maintenance:
- Conduct regular system maintenance, including defragmenting hard drives (for HDDs) and updating drivers, to optimize performance.
- Consider Overall System Upgrade:
- If multiple components are outdated, consider a comprehensive system upgrade to ensure a balanced and efficient computing experience.
In summary, outdated hard drives and graphics cards can significantly impact a computer’s speed, causing bottlenecks, slower performance, and compatibility issues with modern applications. Upgrading these components is a strategic investment in enhancing overall system performance and user experience.
Upgrading hardware components is a proactive approach to enhancing overall system performance. Here are tips on upgrading various hardware components for improved speed and efficiency:
**1. *Upgrading RAM:*
- Determine System Compatibility:
- Check the maximum RAM capacity supported by your motherboard and the type of RAM (DDR3, DDR4, etc.) it requires.
- Choose Quality RAM Modules:
- Invest in reputable brands for reliability. Choose RAM modules with suitable speed (measured in MHz) and capacity based on your computing needs.
- Install Matching Modules:
- If upgrading, try to match the speed and capacity of your existing RAM modules to maintain optimal performance.
- Follow Installation Guidelines:
- Consult your motherboard manual for guidance on RAM installation. Ensure modules are seated correctly in their respective slots.
- Check System Recognition:
- After installation, check the system information to confirm that the new RAM is recognized and operating at the intended speed.
**2. *Upgrading Storage (Hard Drive to SSD):*
- Choose the Right SSD:
- Select an SSD with sufficient capacity for your operating system, applications, and frequently used files. Consider factors like read and write speeds.
- Data Migration or Clean Install:
- Decide whether to migrate your existing data to the new SSD or perform a clean install of the operating system for a fresh start.
- Use Manufacturer Tools:
- Many SSD manufacturers provide software tools for data migration and optimization. Utilize these tools to streamline the upgrading process.
- Update Firmware:
- Check for firmware updates for the SSD and update it to ensure compatibility and performance improvements.
- Configure BIOS Settings:
- Access the BIOS settings and make sure that the system recognizes the new SSD. Adjust settings like AHCI mode for optimal SSD performance.
**3. *Upgrading Graphics Card:*
- Check Compatibility:
- Ensure that the new graphics card is compatible with your motherboard and power supply. Check physical dimensions to ensure it fits in your case.
- Consider Power Requirements:
- Check the power requirements of the new graphics card and ensure your power supply unit (PSU) can provide sufficient power.
- Install Latest Drivers:
- Download the latest graphics card drivers from the manufacturer’s website and install them for optimal performance and compatibility.
- Monitor Temperatures:
- Newer graphics cards may generate more heat. Monitor temperatures and consider additional cooling solutions if needed.
**4. *Upgrading CPU:*
- Check Socket Compatibility:
- Ensure that the new CPU is compatible with your motherboard’s socket. Different generations of CPUs may use different sockets.
- Consider Cooling Solutions:
- Upgrading to a more powerful CPU may require a more robust cooling solution. Ensure your current cooling solution is adequate or upgrade it.
- Update BIOS/UEFI:
- Check and update your motherboard’s BIOS/UEFI to the latest version to ensure compatibility with the new CPU.
- Apply Thermal Paste:
- If installing a new CPU, apply a fresh layer of thermal paste between the CPU and the heatsink for efficient heat dissipation.
**5. *Comprehensive System Upgrade:*
- Assess Overall Compatibility:
- When upgrading multiple components, ensure compatibility between all new hardware and existing components, including the motherboard.
- Consider Power Supply:
- Upgrading multiple components may require a higher wattage power supply. Check your power supply’s capacity and upgrade if necessary.
- Plan for Data Migration:
- Plan the migration of your operating system, applications, and data to the new storage device to avoid data loss.
- Backup Data:
- Before any major upgrade, perform a complete backup of your important data to prevent potential data loss during the upgrading process.
**6. *Professional Assistance:*
- Consult Manufacturer Guides:
- Refer to manufacturer guides for specific installation and compatibility information for each component.
- Seek Professional Help:
- If you are unsure or uncomfortable with the upgrading process, consider seeking assistance from professionals or knowledgeable friends.
By following these tips and guidelines, you can successfully upgrade hardware components to improve your computer’s overall performance. Always refer to manufacturer documentation and guidelines for specific details related to your hardware.
Section 2: Optimizing Software for Better Speed
2.1: Disk Cleanup
Cleaning up unnecessary files and freeing up disk space is essential for maintaining a well-organized and efficient computer. Here’s a step-by-step guide to help users through the process:
For Windows:
1. Disk Cleanup Utility:
- Open Disk Cleanup:
- Press
Win + Sto open the search bar. - Type “Disk Cleanup” and select the utility from the search results.
- Choose Drive:
- Select the drive you want to clean (usually C:).
- System Files:
- Click on “Clean up system files” to include system files in the cleanup.
- Select File Types:
- Check the file types you want to delete, such as Temporary files, Recycle Bin, and System created Windows Error Reporting.
- Start Cleanup:
- Click “OK” and then “Delete Files” to initiate the cleanup process.
2. Storage Sense:
- Open Settings:
- Press
Win + Ito open the Settings app.
- Go to System:
- Navigate to “System” > “Storage.”
- Enable Storage Sense:
- Toggle on “Storage sense” to enable automatic cleanup.
- Configure Storage Sense:
- Click on “Configure Storage Sense or run it now” to customize cleanup settings and frequency.
3. Uninstall Unused Programs:
- Open Control Panel:
- Press
Win + R, type “control,” and press Enter.
- Go to Programs:
- Navigate to “Programs” > “Programs and Features.”
- Uninstall Programs:
- Right-click on unused programs and select “Uninstall” to free up space.
For Mac:
1. About This Mac:
- Click Apple Menu:
- Click on the Apple logo in the top-left corner.
- Select “About This Mac”:
- Choose “About This Mac” and then click on “Storage.”
- Manage Storage:
- Click on “Manage” to open the storage management utility.
- Review Recommendations:
- Review recommendations and perform actions like optimizing storage, deleting mail attachments, and emptying Trash.
2. Finder Cleanup:
- Open Finder:
- Open a Finder window.
- Go to Applications:
- Navigate to “Applications” and uninstall unused applications.
- Check Downloads:
- Clear out the “Downloads” folder of unnecessary files.
3. Time Machine Cleanup:
- Open System Preferences:
- Click on the Apple logo, go to “System Preferences,” and select “Time Machine.”
- Exclude Folders:
- Exclude unnecessary folders from Time Machine backups to save space.
For Both Windows and Mac:
1. Delete Temporary Files:
- Browser Cache:
- Clear browser caches and temporary files.
- Temporary Folders:
- Manually delete files from temporary folders (e.g., Windows: C:\Windows\Temp, Mac: /private/var/tmp).
2. Organize Files:
- Documents and Downloads:
- Organize and delete unnecessary files in the Documents and Downloads folders.
- Desktop Cleanup:
- Clean up the desktop by moving files to organized folders.
3. External Drives:
- Check External Drives:
- If applicable, check external drives for large files and unnecessary data.
- Backup and Delete:
- Backup important files and consider deleting unnecessary data from external drives.
4. Third-Party Cleanup Tools (Optional):
- CCleaner (Windows):
- Consider using tools like CCleaner to automate the cleanup process.
- CleanMyMac (Mac):
- CleanMyMac is a popular tool for optimizing Mac storage.
Important Tips:
- Backup Data:
- Before deleting files, ensure important data is backed up to prevent accidental data loss.
- Regular Cleanup:
- Make disk cleanup a regular practice to maintain optimal system performance.
- Review Large Files:
- Identify and review large files to determine if they can be safely deleted or moved to external storage.
By following these steps, users can efficiently clean up unnecessary files and free up valuable disk space, contributing to improved system performance and organization.
Subsection 2.2: Disable Startup Programs
Having too many startup programs can significantly slow down the boot times of your computer. When you turn on your computer, the operating system loads various processes and applications to prepare the system for use. If a large number of programs are set to start automatically with the system, it can lead to several performance issues:
- Increased Boot Time:
- Each startup program consumes system resources, including CPU, RAM, and storage I/O. When there are many programs trying to launch simultaneously during startup, it puts a heavy load on these resources, resulting in a longer boot time.
- Resource Contention:
- With multiple programs launching at the same time, there is increased competition for system resources. This can lead to resource contention, where programs compete for processing power and memory, causing delays and sluggish performance.
- Disk I/O Bottlenecks:
- Many startup programs may access the hard drive or SSD to load necessary files. When multiple programs try to access the disk simultaneously, it can create I/O bottlenecks, slowing down the overall boot process.
- Delayed Desktop Accessibility:
- Too many startup programs can delay the appearance of the desktop. The user may have to wait longer before the system becomes responsive and usable.
- Impact on System Responsiveness:
- The additional load from numerous startup programs can affect the responsiveness of the system even after booting. Users may experience delays when opening applications or performing other tasks.
- CPU Usage Spikes:
- As each startup program initializes, it consumes CPU resources. If there are too many programs competing for CPU time during startup, it can lead to spikes in CPU usage, causing delays in the overall boot process.
- Impact on Background Processes:
- Some startup programs may continue running in the background even after the boot process is complete. This ongoing background activity can further impact system performance, especially if these programs are resource-intensive.
How to Manage Startup Programs:
To improve boot times and overall system performance, consider managing startup programs:
- Disable Unnecessary Startup Programs:
- Review the list of startup programs and disable those that are not essential for your daily use. This can often be done through the Task Manager on Windows, System Preferences on macOS, or the Startup Applications tool on Linux.
- Prioritize Essential Programs:
- Identify critical programs that you use frequently and ensure they start with the system. Prioritize those that are essential for immediate use.
- Use Startup Managers:
- Some operating systems and third-party tools provide startup managers that allow you to control which programs launch during startup. Use these tools to easily enable or disable startup items.
- Regularly Review and Update:
- Periodically review and update your list of startup programs. As your usage patterns change, so may the necessity of certain programs starting with the system.
By managing startup programs effectively, you can optimize boot times and ensure a smoother and more responsive computing experience
Disabling unnecessary startup programs can significantly improve boot times and overall system performance. Here are instructions for disabling startup programs on different operating systems:
For Windows:
Using Task Manager:
- Open Task Manager:
- Right-click on the taskbar and select “Task Manager” or press
Ctrl + Shift + Escto open Task Manager.
- Navigate to Startup Tab:
- In Task Manager, go to the “Startup” tab.
- Disable Unnecessary Programs:
- You’ll see a list of programs that start with Windows. Right-click on the programs you want to disable and select “Disable.”
- Confirm Changes:
- Confirm any prompts that appear. The changes will take effect the next time you restart your computer.
Using System Configuration (msconfig):
- Open System Configuration:
- Press
Win + Rto open the Run dialog. - Type
msconfigand press Enter.
- Navigate to the Startup Tab:
- In the System Configuration window, go to the “Startup” tab.
- Disable Programs:
- Uncheck the boxes next to the programs you want to disable.
- Apply and Restart:
- Click “Apply” and then “OK.” Restart your computer to apply the changes.
For macOS:
Using System Preferences:
- Open System Preferences:
- Click on the Apple logo in the top-left corner and select “System Preferences.”
- Go to Users & Groups:
- Choose “Users & Groups.”
- Select Your User Account:
- Click on your user account in the left sidebar.
- Go to Login Items:
- Navigate to the “Login Items” tab.
- Disable Unnecessary Programs:
- Select the programs you want to remove from startup and click the “-” button below the list.
For Linux (Ubuntu as an example):
Using Startup Applications:
- Open Startup Applications:
- Press
Super(Windows key) and type “Startup Applications.”
- Navigate to Startup Tab:
- In the Startup Applications window, go to the “Startup” tab.
- Disable Unnecessary Programs:
- Uncheck the boxes next to the programs you want to disable.
- Close and Restart:
- Close the Startup Applications window. The changes will take effect upon the next restart.
General Tips:
- Review Taskbar Icons:
- Some programs may also have settings to control whether they start with Windows. Check for options in the program’s settings or right-click on its taskbar icon.
- Check Program Settings:
- Some programs might have their own settings to control startup behavior. Look for options in the program’s settings or preferences.
- Regularly Review and Update:
- Periodically review and update your list of startup programs to ensure it aligns with your current usage patterns.
By disabling unnecessary startup programs, you can streamline the boot process and improve the overall performance of your computer.
2.3: Update Operating System and Software
Keeping the operating system and applications up-to-date is crucial for various reasons, ranging from security to performance and feature enhancements. Here are key reasons why regular updates are important:
**1. *Security:*
- Patch Vulnerabilities:
- Updates often include security patches that address vulnerabilities discovered in the software. Neglecting updates leaves your system and applications susceptible to exploitation by cyber threats.
- Protect Against Malware:
- Malicious actors often target outdated software. Regular updates ensure that your system is equipped with the latest security measures to defend against malware and other cyber threats.
- Enhance Data Privacy:
- Updates may include privacy enhancements, protecting your personal and sensitive data from unauthorized access and potential breaches.
**2. *Performance and Stability:*
- Bug Fixes:
- Updates frequently include bug fixes that improve the overall stability and performance of the operating system and applications. Resolving bugs contributes to a smoother user experience.
- Optimized Code:
- Developers continuously optimize code to enhance performance. Updates provide access to these optimizations, resulting in faster and more efficient operation of software.
**3. *New Features and Functionality:*
- Access to New Features:
- Updates often introduce new features, functionalities, and improvements to existing ones. Keeping your software current ensures you benefit from the latest capabilities.
- Compatibility:
- Updates may address compatibility issues with newer hardware, file formats, or other software. Staying up-to-date ensures seamless integration with evolving technologies.
**4. *User Experience:*
- Improved User Interface:
- Updates may include enhancements to the user interface, making applications more intuitive and user-friendly. Regular updates contribute to a positive and modern user experience.
- Access to Support:
- Software vendors typically offer support for the latest versions of their products. Using outdated software may limit your access to support services, making problem resolution more challenging.
**5. *Legal Compliance:*
- License and Regulatory Compliance:
- Some software updates may be necessary to maintain compliance with licensing agreements or industry regulations. Staying current ensures legal adherence and avoids potential issues.
**6. *Automated Security and Convenience:*
- Automatic Updates:
- Many operating systems and applications offer automated update mechanisms. Enabling automatic updates ensures that your system is continuously protected without requiring manual intervention.
- Time and Effort Savings:
- Regular updates prevent the accumulation of outdated versions, reducing the effort needed to catch up on updates after prolonged periods.
**7. *Proactive Problem Prevention:*
- Early Detection of Issues:
- Updates may address issues discovered by users or reported by the community. Proactively applying updates helps prevent potential problems before they impact your system.
- Stay Ahead of Evolving Threats:
- As cyber threats evolve, updates help you stay ahead of new attack vectors and security challenges. Being proactive in updating is a critical aspect of cybersecurity.
Conclusion:
In summary, maintaining an up-to-date operating system and applications is paramount for security, performance, feature access, and overall user experience. Regularly applying updates is a proactive and essential practice to ensure the ongoing health and functionality of your computer system.
- Offer step-by-step instructions on how to check for updates.
Section 3: Conducting System Maintenance
Subsection 3.1: Malware and Virus Scans
Malware and viruses can have a profound impact on system performance, causing a range of issues that affect the overall functionality and stability of a computer. Here’s a closer look at how malware and viruses can negatively affect system performance:
**1. *Resource Consumption:*
- CPU Usage:
- Many types of malware run in the background, consuming CPU resources for malicious activities. This can lead to a significant increase in CPU usage, resulting in system slowdowns and decreased performance.
- Memory Usage:
- Malware may allocate a considerable amount of system memory for its operations. This can lead to memory shortages, causing programs to crash, and the system to become sluggish.
**2. *Disk I/O and Storage Issues:*
- Excessive Disk Activity:
- Some malware engage in continuous read and write operations on the storage devices, causing excessive disk activity. This not only slows down the system but also wears out the storage medium over time.
- Storage Space Depletion:
- Certain types of malware replicate themselves or generate large amounts of unnecessary data, rapidly depleting available storage space. This can lead to a lack of space for legitimate system operations and applications.
**3. *Network Performance Impact:*
- Bandwidth Consumption:
- Malware often communicates with remote servers for command and control purposes, data exfiltration, or downloading additional malicious payloads. This can consume network bandwidth, leading to slower internet speeds for the user.
**4. *System Instability:*
- Random Crashes and Freezes:
- Malware can interfere with system processes, leading to random crashes and freezes. Users may experience frequent application crashes or find that the entire system becomes unresponsive.
- Blue Screen of Death (BSOD):
- Certain types of malware can trigger critical errors, leading to the infamous Blue Screen of Death on Windows systems. This results in a complete system crash, requiring a restart.
**5. *Browser Hijacking:*
- Slow Browsing Experience:
- Browser-based malware, such as adware and browser hijackers, can significantly slow down internet browsing by injecting unwanted ads, redirecting users to malicious websites, and altering browser settings.
**6. *Increased Boot Time:*
- Delayed Startup:
- Some malware embed themselves in the startup processes, causing delays during boot-up. This results in a longer time for the system to become operational after being powered on.
**7. *Data Corruption and Loss:*
- Corruption of Files:
- Certain malware, especially ransomware, can encrypt or corrupt files, rendering them inaccessible. This not only impacts data integrity but can also lead to a loss of important information.
**8. *Privacy Invasion:*
- Keylogging and Surveillance:
- Malicious software, such as keyloggers, can monitor and record user activities, compromising sensitive information. This invasion of privacy can also impact system performance as these processes run in the background.
**9. *System-wide Impact:*
- Degradation of Overall System Performance:
- The cumulative effect of malware activities can result in a noticeable degradation of overall system performance. This includes slower response times, increased latency, and an overall less responsive computing experience.
Conclusion:
The impact of malware and viruses on system performance is multifaceted, affecting various aspects of the computer’s operation. It is crucial to invest in robust cybersecurity measures, including regular updates, antivirus software, and safe browsing practices, to mitigate the risks associated with malware and ensure optimal system performance.
Choosing reputable antivirus software and performing regular scans are essential for maintaining a secure and well-protected computer system. Here are recommendations for reputable antivirus software, along with a guide on how to perform regular scans:
Reputable Antivirus Software:
- Bitdefender:
- Known for its excellent malware detection and low system impact, Bitdefender offers a range of security solutions for different platforms, including Windows, macOS, Android, and iOS.
- Norton 360:
- Norton is a well-established name in the cybersecurity industry. Norton 360 provides comprehensive protection against malware, phishing, and other online threats.
- Kaspersky Internet Security:
- Kaspersky is recognized for its advanced malware detection capabilities. Kaspersky Internet Security offers features such as real-time protection, firewall, and a secure VPN.
- McAfee Total Protection:
- McAfee is a long-standing player in the antivirus market. Total Protection provides antivirus, identity protection, and a variety of additional security features.
- Avast Free Antivirus:
- Avast is known for its free antivirus solution that offers solid protection. It also has a premium version with additional features for those who want more comprehensive security.
- ESET NOD32 Antivirus:
- ESET is renowned for its lightweight and effective antivirus solutions. NOD32 Antivirus provides strong protection without slowing down the system.
- Malwarebytes:
- Malwarebytes is particularly effective against malware and is often used as a supplementary tool alongside traditional antivirus software. It offers both a free and a premium version.
Guide for Regular Scans:
Performing regular antivirus scans is crucial for identifying and removing potential threats. Here’s a step-by-step guide:
For Windows:
- Install Antivirus Software:
- Choose and install one of the reputable antivirus software mentioned above.
- Update Antivirus Definitions:
- Ensure that your antivirus software is up to date by regularly checking for and installing the latest virus definitions.
- Scheduled Scans:
- Most antivirus software allows you to schedule automatic scans. Set up a regular schedule (e.g., weekly or bi-weekly) for full system scans.
- Manual Scans:
- Perform manual scans periodically, especially if you notice any unusual system behavior or if your antivirus software provides recommendations for a manual check.
For macOS:
- Install Antivirus Software:
- While macOS is generally considered more secure, it’s still a good idea to use antivirus software. Install a reputable solution like Bitdefender or Norton.
- Update Antivirus Definitions:
- Keep the antivirus software updated to ensure it can recognize the latest threats.
- Scheduled Scans:
- Schedule regular automatic scans, and adjust the frequency based on your preferences.
- Manual Scans:
- Conduct manual scans periodically to check for any potential threats.
For Both Windows and macOS:
- Safe Browsing Habits:
- Adopt safe browsing habits to avoid downloading suspicious files or visiting potentially harmful websites.
- Email Security:
- Be cautious with email attachments and links. Avoid opening attachments from unknown senders.
- Software Updates:
- Keep your operating system and all software up to date. Security patches can address vulnerabilities that malware may exploit.
- Regular Backups:
- Create regular backups of important data. In case of a malware attack, having a backup ensures you can restore your system to a clean state.
Conclusion:
By selecting reputable antivirus software and incorporating regular scans into your cybersecurity routine, you can significantly enhance your computer’s protection against malware and other security threats. Additionally, practicing safe online behaviors and maintaining an updated system contribute to a robust defense against potential risks.
3.2: Fragmentation and Disk Optimization
Disk fragmentation is a phenomenon that occurs when files on a storage device are not stored in contiguous or sequential blocks. Instead, they are scattered in non-contiguous clusters across the storage medium. This fragmentation can happen over time as files are created, modified, and deleted. As a result, the data becomes fragmented, and the file system has to access multiple locations on the disk to retrieve a single file. Here’s an explanation of disk fragmentation and its effects on speed:
How Disk Fragmentation Occurs:
- File Creation and Deletion:
- When files are created or existing files are modified, the operating system allocates space for them on the storage device. If the available space is not large enough to accommodate the entire file, it is stored in non-contiguous clusters.
- File Deletion:
- When files are deleted, the space they occupied may become fragmented as new files are created and fill in the gaps left by deleted files.
- Dynamic Nature of Storage:
- The dynamic nature of file creation, modification, and deletion leads to the gradual fragmentation of data on the disk.
Effects of Disk Fragmentation on Speed:
- Increased Read and Write Times:
- Fragmented files require the disk’s read/write head to seek and access multiple locations to retrieve or write the data. This results in increased read and write times, slowing down file access.
- Reduced Sequential Access:
- Storage devices are designed to read data sequentially. Fragmentation disrupts this sequential access pattern, causing the read/write head to jump around the disk, leading to inefficiencies.
- Decreased System Performance:
- Fragmentation can contribute to decreased overall system performance, especially during tasks that involve accessing a large number of files, such as booting up the operating system or launching applications.
- Hard Drive Wear and Tear:
- The constant movement of the read/write head to access fragmented data can contribute to increased wear and tear on traditional hard drives (HDDs), potentially reducing their lifespan.
- Longer Boot Times:
- Booting up the operating system requires accessing numerous system files. If these files are fragmented, the boot process may take longer as the system navigates through scattered clusters.
- File Access Latency:
- Users may experience latency and delays when opening or saving files, especially large ones, due to the time it takes to gather data from multiple fragmented locations.
Preventing and Addressing Disk Fragmentation:
- Disk Defragmentation:
- Most operating systems include built-in disk defragmentation tools. Running these tools helps consolidate fragmented files, organizing them in a more sequential manner for improved access times.
- Scheduled Maintenance:
- Schedule regular disk maintenance, including automatic defragmentation, to prevent excessive fragmentation from occurring.
- Use of SSDs:
- Solid-state drives (SSDs) have no moving parts and are less susceptible to fragmentation-related issues. However, occasional optimization may still be beneficial.
- Adequate Free Space:
- Ensure that there is sufficient free space on the storage device to reduce the likelihood of fragmentation during file creation and modification.
Conclusion:
Disk fragmentation can significantly impact the speed and performance of a computer system, particularly on traditional hard drives. Regular disk maintenance, including defragmentation, is essential to optimize file storage and maintain efficient data access times. Solid-state drives, with their lack of moving parts, are less affected by fragmentation, but periodic optimization can still be beneficial for overall system performance.
Sure, I’ll provide instructions for both defragmenting disks on Windows and optimizing storage on Mac.
Defragmenting Disks on Windows:
Using Built-in Tool (Windows 10 and Windows 11):
- Open Disk Defragmenter:
- Press
Win + Sto open the search bar. - Type “Defragment and Optimize Drives” and select the result.
- Select Drive:
- In the “Optimize Drives” window, select the drive you want to defragment.
- Click Optimize:
- Click the “Optimize” button to start the defragmentation process.
- Monitor Progress:
- The tool will analyze and optimize the drive. Monitor the progress and wait for the process to complete.
Using Command Prompt:
- Open Command Prompt:
- Press
Win + S, type “Command Prompt,” right-click on it, and select “Run as administrator.”
- Run Defrag Command:
- Type the following command and press Enter:
defrag C: /O - Replace “C:” with the letter of the drive you want to defragment.
- Monitor Progress:
- The command prompt will display the progress of the defragmentation process.
Optimizing Storage on Mac:
Using Built-in Tools (macOS):
- Storage Management:
- Click on the Apple logo in the top-left corner and select “About This Mac.”
- Go to the “Storage” tab to see a visual representation of your storage usage.
- Optimize Storage:
- Click on the “Manage” button to open the storage management utility.
- Review Recommendations:
- macOS provides recommendations for optimizing storage, such as clearing clutter, managing photos, and removing large files.
- Clear Downloads:
- Delete unnecessary files from the “Downloads” folder.
- Empty Trash:
- Empty the Trash to permanently delete files.
Using Third-Party Apps (Optional):
- DaisyDisk:
- DaisyDisk is a third-party app available on the Mac App Store that provides a detailed visualization of disk usage. It helps identify large files and folders for deletion.
- CleanMyMac X:
- CleanMyMac X is another third-party app that offers various optimization tools, including cleaning up system junk, removing large files, and managing extensions.
Additional Tips for Mac:
- Regularly Review Files:
- Manually review and delete files you no longer need.
- Manage iCloud Storage:
- If you use iCloud, consider optimizing storage by storing some files in iCloud and keeping only essential files on your Mac.
- Clear Browser Cache:
- Regularly clear your browser cache to free up space.
- Check Mail Attachments:
- Review and delete email attachments that are taking up space.
Remember, while defragmentation is essential for traditional hard drives on Windows, it is not required for SSDs or on Mac, as macOS automatically optimizes storage. For SSDs, focus on managing storage efficiently and ensuring your system is up to date. Always exercise caution when using third-party tools and only use reputable applications from trusted sources.
Section 4: Advanced Techniques for Speed Boost
1: Upgrade to SSD
Upgrading to a Solid State Drive (SSD) from a traditional Hard Disk Drive (HDD) offers numerous advantages, significantly enhancing the overall performance and user experience of a computer. Here are the key advantages of upgrading to an SSD:
1. Speed and Performance:
- Faster Boot Times:
- SSDs provide near-instantaneous boot times, allowing your computer to start up quickly.
- Rapid File Access:
- The lack of moving parts in SSDs enables faster read and write speeds, resulting in quicker access to files and applications.
- Improved System Responsiveness:
- SSDs contribute to a more responsive computing experience, reducing the time it takes to launch applications and navigate through the operating system.
- Shorter Loading Times:
- Games and large applications load faster on SSDs, leading to reduced loading times and smoother gameplay.
2. Reliability and Durability:
- No Moving Parts:
- Unlike HDDs, SSDs have no spinning disks or moving read/write heads. This makes them less susceptible to mechanical failures and physical shocks.
- Lower Heat Generation:
- SSDs generate less heat during operation, contributing to improved overall system reliability and stability.
3. Energy Efficiency:
- Lower Power Consumption:
- SSDs consume less power than traditional HDDs, resulting in increased energy efficiency and potentially longer battery life in laptops.
4. Silent Operation:
- No Noise:
- Since SSDs have no moving parts, they operate silently, eliminating the noise associated with spinning disks and moving read/write heads in HDDs.
5. Compact and Lightweight:
- Compact Form Factor:
- SSDs are smaller and lighter than HDDs, making them ideal for laptops and ultrabooks where space and weight are critical factors.
6. Enhanced Data Transfer Speeds:
- Faster Data Transfer:
- SSDs support higher data transfer rates, enabling faster copying and transferring of files between drives.
7. Longer Lifespan:
- Limited Wear and Tear:
- While SSDs have a finite number of write cycles, modern SSDs come with technologies like wear leveling and over-provisioning, extending their lifespan.
8. Improved Multitasking:
- Efficient Multitasking:
- SSDs allow for more efficient multitasking, as they can handle simultaneous read and write operations more effectively than HDDs.
9. Better Resistance to Temperature and Humidity:
- Temperature Tolerance:
- SSDs are generally more tolerant to temperature variations and humidity, making them suitable for a wider range of operating environments.
10. Compatibility:
- Compatibility with Older Systems:
- Many SSDs are backward-compatible with older systems that have traditional SATA interfaces, providing a performance boost to older computers.
11. Security and Data Protection:
- Less Prone to Data Loss:
- SSDs are less prone to data loss due to physical damage, such as dropping the device, making them a more reliable option for preserving valuable data.
Conclusion:
Upgrading to an SSD brings a significant performance boost, reliability improvements, and an overall better computing experience. Whether for a desktop or laptop, the advantages of SSDs make them a worthwhile investment for users seeking faster and more efficient storage solutions.
Migrating your operating system to an SSD involves transferring your existing system from the old storage drive (HDD or smaller SSD) to the new SSD. Here’s a step-by-step guide to help you with the process. Note that the exact steps may vary depending on your specific hardware and software configuration.
Prerequisites:
- Backup Data:
- Before you start, ensure that you have a complete backup of your important data. This is a precautionary measure in case of any unforeseen issues during the migration process.
- Check SSD Capacity:
- Make sure the capacity of your new SSD is sufficient to accommodate the data on your existing drive. If the SSD is larger, you may need to adjust partition sizes during the migration.
- Obtain a SATA-to-USB Adapter (Optional):
- If your computer has only one drive bay or you are migrating from a laptop, having a SATA-to-USB adapter can be helpful for the migration process.
Step 1: Acquire Migration Software:
- Download Migration Software:
- Obtain migration software such as Acronis True Image, EaseUS Todo Backup, or Samsung Data Migration Tool (for Samsung SSDs). Download and install the software on your computer.
Step 2: Connect the SSD:
- Connect SSD to Computer:
- Physically connect your new SSD to your computer using a SATA cable and power cable. If you are using a laptop, connect the SSD using a SATA-to-USB adapter.
Step 3: Run the Migration Software:
- Open Migration Software:
- Launch the migration software you installed in Step 1.
- Select Source and Target Drives:
- Choose your existing drive (the one you want to migrate from) as the source drive and the new SSD as the target drive.
- Clone or Migrate:
- Follow the software’s instructions to select the cloning or migration option. This will copy the contents of your existing drive to the new SSD.
- Adjust Partition Sizes (if needed):
- If your SSD is larger than your existing drive and you want to allocate more space to certain partitions, some migration tools allow you to adjust partition sizes during the process.
Step 4: Start the Migration Process:
- Begin Migration:
- Start the migration process. The software will begin copying data from the source drive to the target SSD. This may take some time depending on the amount of data.
Step 5: Shut Down and Replace Drives:
- Shutdown Computer:
- Once the migration is complete, shut down your computer.
- Replace Drives:
- If you are using a desktop, replace the existing drive with the new SSD. If you are using a laptop, replace the existing drive with the new SSD or install the SSD in an available slot.
Step 6: Boot from the SSD:
- Power On:
- Power on your computer.
- Access BIOS/UEFI:
- During the boot process, access the BIOS or UEFI settings. This is typically done by pressing a key (such as F2, Del, or Esc) as your computer starts up.
- Set Boot Priority:
- Set the boot priority to the new SSD. Save the changes and exit.
Step 7: Verify and Optimize:
- Verify Boot from SSD:
- Confirm that your computer boots from the new SSD.
- Optimize SSD (Optional):
- Some SSDs may come with optimization tools. If so, you can use them to ensure your SSD is running efficiently.
Step 8: Final Checks:
- Verify Data Integrity:
- Check that all your data is intact on the new SSD.
- Format Old Drive (if needed):
- If you are no longer using the old drive, you can format it for additional storage or repurpose it.
Conclusion:
Migrating your operating system to an SSD can significantly improve your system’s performance. Follow these steps carefully, and always refer to the documentation provided by your SSD manufacturer for specific guidance related to their tools and software.
Subsection 4.2: Adjusting Visual Effects
Disabling certain visual effects on your computer can improve performance by reducing the graphical workload on the system’s resources, such as the CPU, GPU, and RAM. Visual effects, while enhancing the overall aesthetic appeal of the user interface, can also consume significant system resources. By disabling or reducing these effects, you can allocate more resources to essential tasks, leading to a smoother and more responsive computing experience. Here’s how disabling visual effects can improve performance:
1. Reduction in CPU and GPU Load:
- Aero Effects (Windows):
- Disabling Aero effects on Windows, such as transparent windows and animations, reduces the graphical load on the GPU and eases the strain on the CPU.
- Animations and Transitions:
- Visual effects like animated transitions between windows and applications can utilize GPU resources. Turning them off reduces the demand on the GPU, allowing it to focus on critical tasks.
2. Improved Responsiveness:
- Faster Window Management:
- Disabling visual effects related to window management results in faster resizing, minimizing, and maximizing of windows, improving overall responsiveness.
- Snappier UI:
- Eliminating animations and visual effects leads to a snappier user interface. Menus, context menus, and dialog boxes appear and disappear more quickly.
3. Memory Conservation:
- Reduced RAM Usage:
- Visual effects often consume additional system memory. Disabling unnecessary effects can free up RAM for other applications, preventing slowdowns and improving multitasking.
4. Enhanced Battery Life (for Laptops):
- Lower GPU Power Consumption:
- Laptops, especially those running on battery power, benefit from reduced GPU workload. Disabling resource-intensive visual effects can extend battery life by reducing power consumption.
5. Optimized Performance on Older Hardware:
- Compatibility with Older Systems:
- Older hardware may struggle with the demands of modern graphical effects. Disabling these effects ensures smoother performance on aging systems.
- Compatibility with Integrated Graphics:
- Integrated graphics solutions, commonly found in budget laptops and desktops, can benefit from reduced visual effects, ensuring a more fluid user experience.
6. Reduced Heat Generation:
- Lower GPU Heat Output:
- Visual effects, especially those involving complex animations, can cause the GPU to work harder and generate more heat. Disabling these effects helps keep the system cooler.
7. Improved Accessibility:
- Reduced Motion Sensitivity:
- Some users may experience discomfort or motion sensitivity due to animated effects. Disabling such effects improves accessibility for individuals with specific visual sensitivities.
8. Faster Boot Times:
- Streamlined Boot Process:
- Disabling visual effects during the boot process can contribute to faster startup times. The system can focus on essential startup tasks without the overhead of graphical animations.
9. Customization for Performance:
- Adjusting Settings Based on Performance Needs:
- Users can customize their visual settings based on their performance requirements. Enabling or disabling specific effects allows for a tailored experience that balances aesthetics with performance.
Conclusion:
While visual effects enhance the user interface and make the computing experience more visually appealing, there are situations where performance takes precedence. Disabling certain visual effects is a practical approach to optimize system resources, improve responsiveness, and enhance the overall performance of the computer, especially in scenarios where resource-intensive tasks are prioritized.
Adjusting visual settings based on user preferences can enhance the overall user experience and tailor the computer’s appearance to individual tastes. Here’s a general guide on how to adjust visual settings on Windows 10, but keep in mind that the steps may vary slightly based on your specific system configuration:
1. Access Display Settings:
- Right-Click on Desktop:
- Right-click on an empty space on your desktop to open the context menu.
- Select “Display Settings”:
- Choose “Display settings” from the context menu. This will open the Display settings window.
2. Adjust Resolution and Orientation:
- Change Screen Resolution:
- In the Display settings, you can adjust the screen resolution to change the clarity and size of text and images. Select a resolution from the drop-down menu.
- Orientation:
- Choose the screen orientation (landscape or portrait) based on your preference.
3. Change Scaling and Layout:
- Scaling:
- Scroll down to the “Scale and layout” section. Adjust the “Change the size of text, apps, and other items” slider to control the overall size of text and interface elements.
- Advanced Scaling Settings:
- Click on “Advanced scaling settings” to further customize scaling options.
4. Customize Colors:
- Choose Accent Color:
- Scroll down to the “Choose your accent color” section. Pick an accent color that suits your preferences.
- Customize Start, Taskbar, and Action Center:
- Toggle the switch under “Show accent color on the following surfaces” to customize where the accent color appears.
5. Adjust Transparency Effects:
- Toggle Transparency Effects:
- Scroll down to the “Transparency effects” section. Toggle the switch to enable or disable transparency effects on the Start menu, taskbar, and other elements.
6. Control Animation Effects:
- Access Advanced System Settings:
- Press
Win + S, type “Advanced system settings,” and select the result. This opens the System Properties window.
- Open Performance Options:
- In the System Properties window, click on the “Settings” button under the Performance section.
- Adjust Visual Effects:
- In the Performance Options window, you can choose between “Let Windows choose what’s best for my computer” or “Adjust for best performance” to disable most visual effects. Alternatively, you can select “Custom” to choose specific effects to enable or disable.
7. Customize Desktop Icons:
- Access Desktop Icon Settings:
- On the desktop, right-click, choose “View,” and then select “Show desktop icons” to toggle the display of desktop icons.
- Change Icon Size and Spacing:
- To further customize icons, right-click on the desktop, choose “View,” and then select “Large icons,” “Medium icons,” or “Small icons” based on your preference.
8. Adjust Cursor and Pointer Options:
- Open Mouse Properties:
- Press
Win + S, type “Mouse settings,” and select the result. In the Mouse settings window, click on “Additional mouse options.”
- Customize Pointer Options:
- In the Mouse Properties window, go to the “Pointer Options” tab to adjust the pointer speed, visibility, and other settings.
9. Explore Additional Personalization Options:
- Themes and Backgrounds:
- Access the “Themes” settings to change your desktop background and overall color scheme.
- Lock Screen:
- Customize the lock screen background and information shown on the lock screen in the “Lock screen” settings.
Conclusion:
In conclusion, a slow computer is a common issue that can be addressed through a combination of software optimization, hardware upgrades, and regular maintenance. By following the steps outlined in this guide, users can significantly enhance their computer’s performance and enjoy a seamless computing experience. Remember, a well-maintained computer is a productive computer.